Blog Archives
A couple of dirty 45’s …
Hi all,
Recently, I decided to have a go at weathering a couple of my Auscision Models 45 class locomotives.
This all came about some time ago after I had opened up one of the models to determine what was going to be required to change the wheelsets to RP25/88.
A problem I found was that the half axles are shouldered, and would not have been easy to replace the wheelsets without drilling out bearings. After a number of weeks just sitting on the workbench, and pondering the NMRA Fine:HO standards, I decided to leave the factory fitted RP25/110 wheelsets in place, as these will operate on the new standards. Also, locomotive wheels are virtually hidden behind their sideframes, so the tyre tread width is not very noticeable.
So, having decided to keep the 110 wheels, and before putting the loco back together, I thought it was an ideal time to do some weathering.
The 45 class model comes apart relatively easily. The couplers are removed, then the four screw retaining the one piece body which reveals the chassis and motor.
The sideframes are amazing pieces of engineering, resulting in a highly detailed copy of the prototype. They also are very easily removed from the bogies.
The bogie keeper plate also unclips easily exposing the drivetrain. The wheelsets were re-gauged to the new back-to-back measurement using a new gauge obtained from DCC Concepts.
The weathering process involves using artists’ acrylic crayons ground into a fine powder then sealed with isopropyl alcohol after each application. The crayons are the Conte brand and were sourced from Art Scene. The technique was shown to me by good friend and fellow weathering artist Aaron Denning.
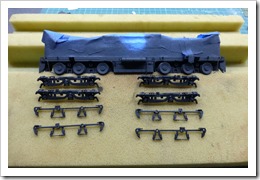
The photo below shows a locomotive separated into its main components, ready to start the weathering process.
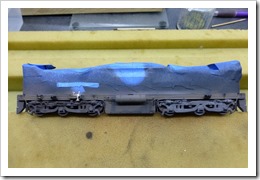
The chassis is then masked off to protect the electricals and motor. The chassis and bogie sideframes are then painted with Krylon camouflage flat black and the body is sprayed with a matt clear coat. I have used Tamiya flat clear.
The sideframes and chassis are then treated with various colours of the powdered crayons, working from photographs to get the desired result.
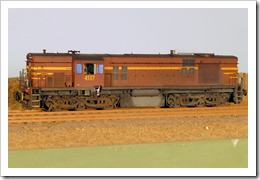
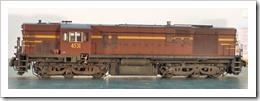
Again working from photographs, the body is treated in a similar manner. An all over dusting is done to tone down the factory colour, then black is applied to the roof. In the pictures below, 4507 has retained the crew and had the windows opened, as it will be a lead unit. 4531 has had the crew removed and windows left closed as it will be a trailing unit in a consist. To do this, the cab needs to be removed and with a bit of delicate poking, pulling and pushing, slides right off the body. This was actually done prior to hitting with the matt finish so the cab interior gets done.
The following shots show the two completed models.
The last picture shows the inspiration for 4531.
That’s two out of eight done!
Cheers.
Chilcott’s Ck bridge assembly – Part III …
Hi all,
Over the last couple of days, I started weathering the Chilcott’s Ck bridge girders and piers.
To refresh the memory, this is the bridge and the weathering effect I am trying to achieve. Even though the photo was taken in the last few years, and I am modelling 30+ years ago, I don’t think the weathering would be much less.
Following on from the previous post on the subject, the completed bridge spans had been painted with Krylon camouflage brown spray paint. The plaster piers were also painted with the Krylon. It is a dead flat matte paint that gives a good surface for the weathering powders to adhere to.
First, a bit of background on the Krylon paint and weathering powders.
At a local model railway exhibition that was held in Sydney earlier this year, a good mate was demonstrating his latest technique for weathering rollingstock.
Rather than me repeating it verbatim, have a read of this PDF as it outlines the technique in detail. For those readers in Australia, I obtained my Conte crayons from an online art supplier, The Art Shop.
How Aaron sprayed the Krylon over a perfectly good model comes across as a bit drastic, but you can see the results. The Krylon is purely there to provide a “keying” surface for the crayon powders.
So, both the bridge girders and piers were painted with the Krylon. The bridge girders then got a good coating of a blue/grey colour then a light hint of various shades of browns to simulate the dirt on the bottom half of the girders.
The plaster piers were then attacked with a light grey colour as a base to get that weathered concrete colour. Some white was also applied to lighten the grey in certain areas. Then it was just a matter of using various shades of browns and black to get the streaking effect.
Below is the result so far.
Still have a bit to do, but probably not far off from being finished. I’ve also been working on the abutments using the same techniques. Below is a photo of progress so far.
Cheers.


